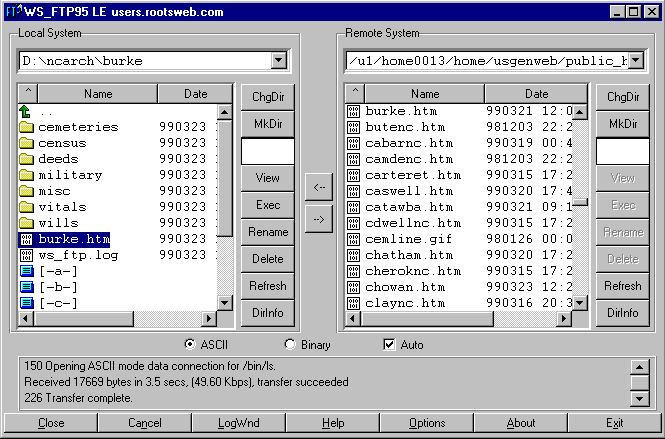
This is a tutorial for managing files in the North Carolina USGenWeb Archives. It is written for new File Managers who will be using the Windows NotePad for editing county Tables of Content (TOC), and WS_FTP for transferring files between their computer and the RootsWeb server. The examples given also apply to other text editors and ftp programs.
The first thing that needs to be done is to setup up the disk drive on the local computer. This is done using the Windows Explorer. First, choose the disk drive that you want to setup for archive file maintenance. [In the following examples, the D: drive is shown]. In Explorer, Click on File, then Click on New and choose Folder. Name the new folder NCArch. After completing this, you should have a display in Explorer similar to this:
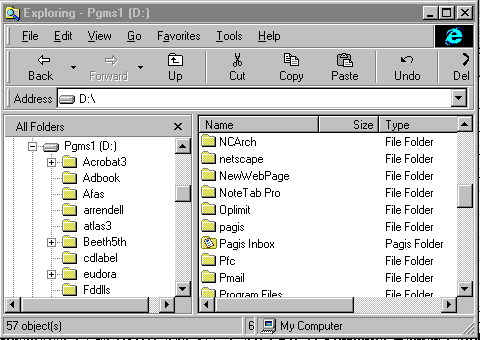
Click on the new NCArch folder to highlite it, then Click on File, and create a new folder for NCArch that has the name of the county archives that will be managed. Burke County is used in the examples. Explorer will show the following:

This ends the first step of setting up the hard drive. The next step requires using WS_FTP to download the existing files that are in the county to be managed from the RootsWeb server to the NCArch Folder.
Before using WS_FTP, it will need to be configured. Start WS_FTP, and the first screen that is shown is the Session Properties Screen. Enter the information that is shown here:
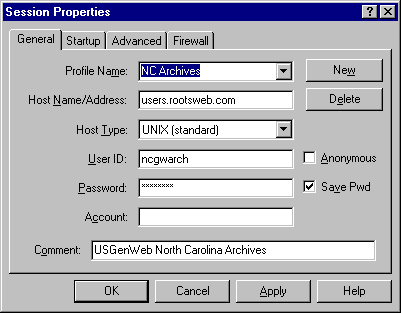
The password is changed periodically. When it is entered, it will be shown with a series of xxxxxxxx. You should write the password down and keep it in a safe place should you need to reconfigure WS_FTP.
On the Session Properties Screen, Click on Startup, then enter the disk drive and folder name that was setup for NCArch. The D: drive is shown here:
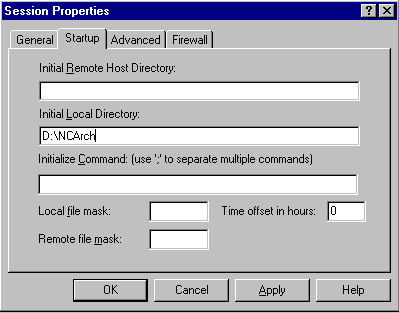
This has setup the Session Properties that are specific to NCArch. Click on Apply, then Click on Cancel. This will bring up the WS_FTP Main Screen:
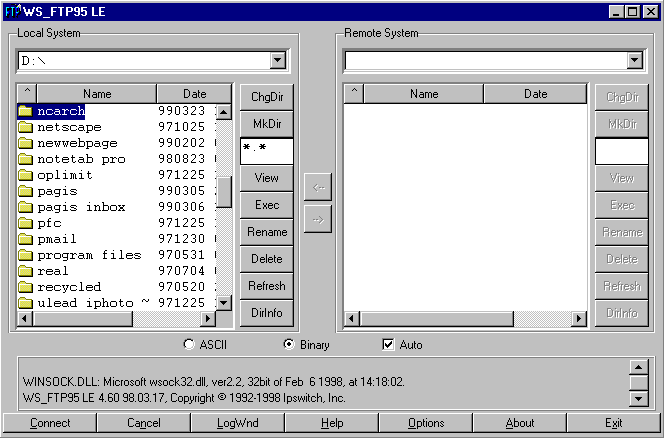
The next step is to configure the general settings. Click on Options to bring up the WS_FTP Properties Screen:
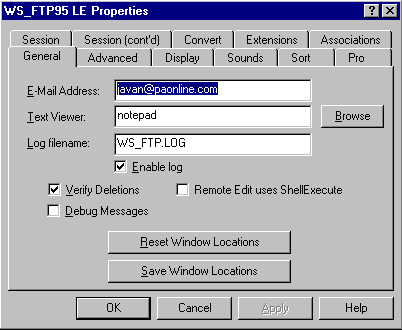
Click on Session, then click on the choice Force Lowercase Remote Names. Always keep all file names in lower case to avoid syntax problems.
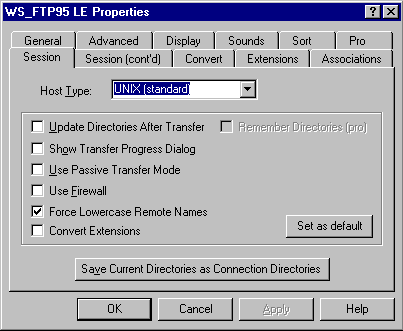
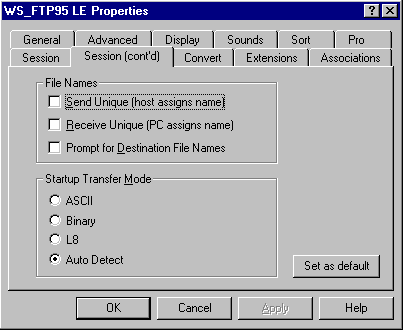
Click on Session(cont'd), then Click on the radio button Auto Detect. When you send and receive files, text files must be sent in the ASCII Mode. Failure to use this mode will make the text file double-spaced. HTML files and graphics are transmitted in the Binary Mode. By using Auto Detect, you do not need to manually change the Mode for different type files.
Click on Extensions. In the small window, type in .txt . Click on Add, which will move the .txt extension to the lower window.
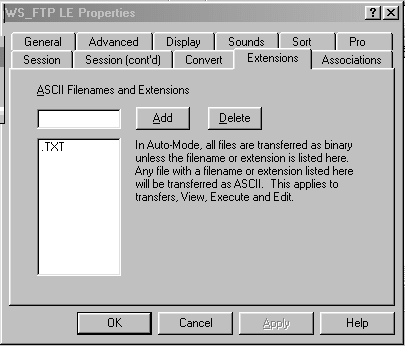
Click on OK to set the configuration. The next step is to go on-line and connect to the RootsWeb Server. On the WS_FTP Main Screen, click on Connect:

On the Session Properties Screen, Click on OK:

Your computer will go on-line and connect to the NCArch Directory on the RootsWeb server. In this Directory, there are two folders, the archive_ftp folder and the archive_html folder. All documents are placed in the archive_ftp folder. All TOCs are placed in the archive_html folder. This latter folder is also used for storage of large files in Zip format, census images, and graphics.

Double Click on the archives_ftp folder icon. This will open the folder that contains all of the county documents. Each county has its own folder:

Burke County is used in this example, so Double Click on Burke County. This will reveal the several categories of documents that are stored in the Burke County folder. Each category has its own folder:
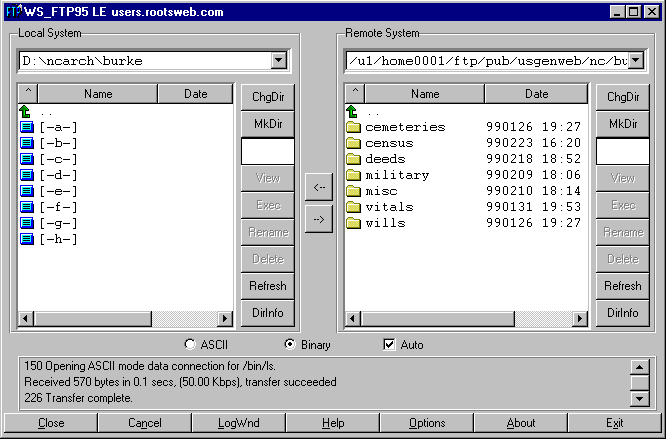
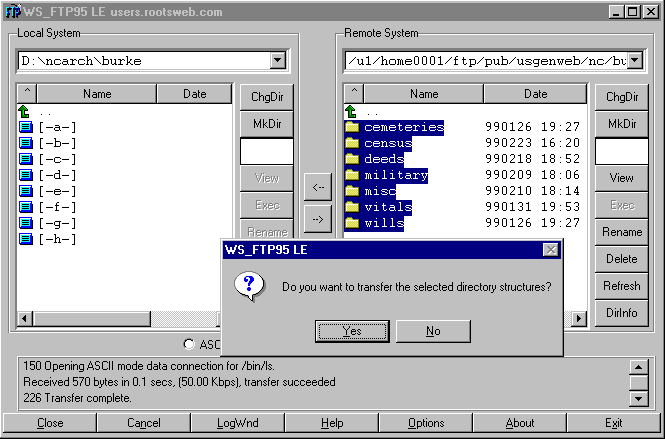
Next is the second step of setting up the hard drive on your computer. All of the category folders that are in the county folder on the RootsWeb server will be downloaded so that the information at the server and in your computer will be identical. Using your mouse, highlite all of the county's category folders on the server, then click on the arrow that is pointing toward your Local System. You will be asked if you want to transfer the selected directory structures. Choose Yes, and WS_FTP will start the transfer. The length of time required for the transfer will depend upon the number and size of files that are archived in the county.
Upon completion of the transfer, WS_FTP will show that the Local System (your computer) and the Remote System (the RootsWeb sever) are identically structured:

The final step of setting up your hard drive is to obtain a copy of the county's current TOC. One of the most important parts of managing the Archive files is keeping the TOC on the server and on your computer identical. The File Manager of a county is the only person who is permitted to change the TOC.
To go from the archive_ftp directory to the archive_html directory, click on the little down arrow that is on the right side of the window which shows the current directory on the Remote System. This will show a list of all of the directories that have been visited:
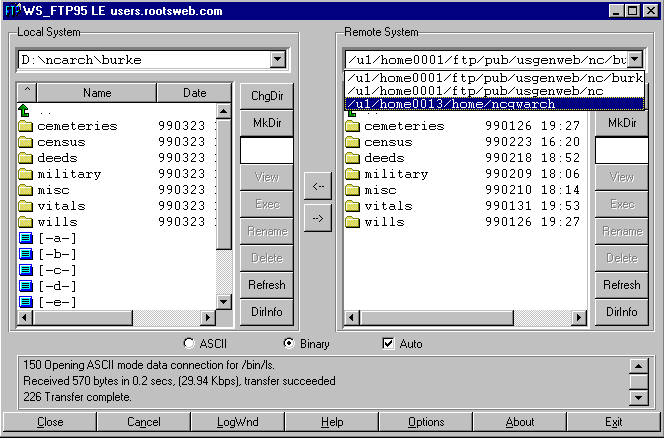
Click on /u1/home0013/home/ncgwarch, and this will take you back to the initial NCArch screen which shows the two archive folders:

Double Click on the archive_html icon, and contents of the folder will be shown on the RootsWeb server. The first items are shown are folders that contain special files for certain counties, such as census images and Zipped files.
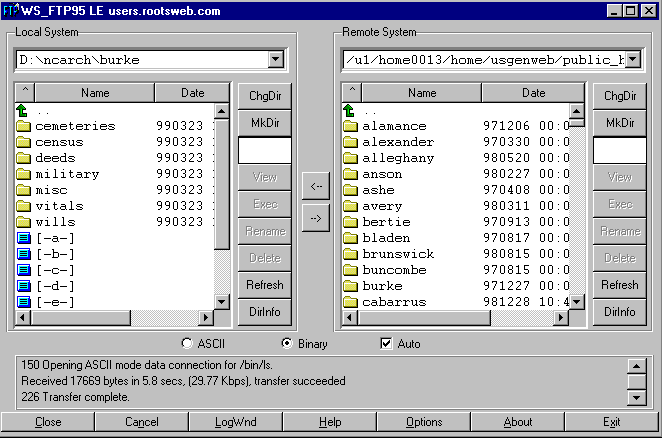
Cursor down to the list of files that follow the county folders, and find the Burke County TOC file, which is named burke.htm:
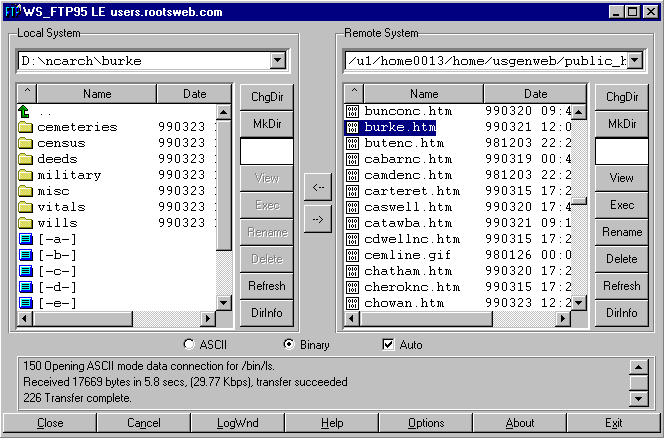
Double Click on burke.htm, and it will be downloaded to your hard drive:
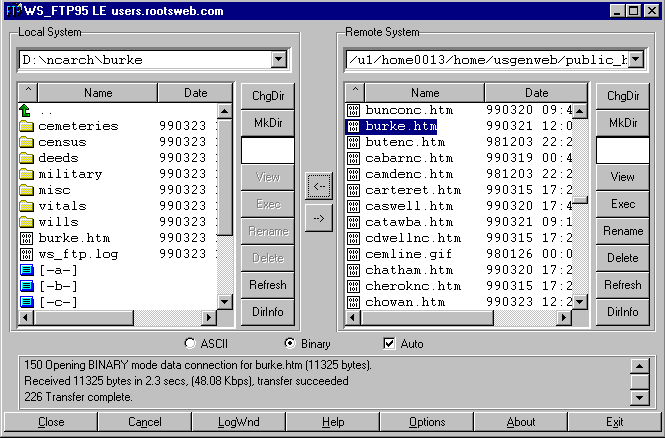
This completes the setup of the hard drive.
Maintaining the Table of Contents(TOC)
The TOC is made up of a series of entries in an HTML table, each entry representing a document that has been archived. Each entry consists of the URL of the document, the date it was posted, the size of the file, the name of the contributor, and the contributor's e-mail address. Here is an example of a TOC entry:
<TR><TD>
<B><A HREF="http://files.usgwarchives.net/nc/burke/cemeteries/chapman.txt">
Chapman Cemetery</A>
<TD><B>Jan 1999</B></TD>
<TD><B>3 kb</B></TD>
<TD><B><A HREF="mailto:wdfloyd@rfci.net">Bill Floyd</A></B></TD>
</TR>
Here is the way that entry would look when the TOC was viewed in a browser:
| Chapman Cemetery | Jan 1999 | 3 kb | Bill Floyd |
The TOC is maintained using a text editor that writes in pure ASCII Text. The Windows operating system comes with NotePad, which has all the capabilities that are needed for TOC maintenance. Windows also has WordPad, which may be used so long as files are saved as Text files. If more than one county is maintained, or if there are lots of files contributed for a county, then a text editor with more capabilities may be desired. Examples of these are EditPad and NoteTab. The following examples use the standard NotePad.
Start NotePad, Click on File, then Click on the Burke County folder that was previously setup. This will display the category folders that were downloaded from the server:
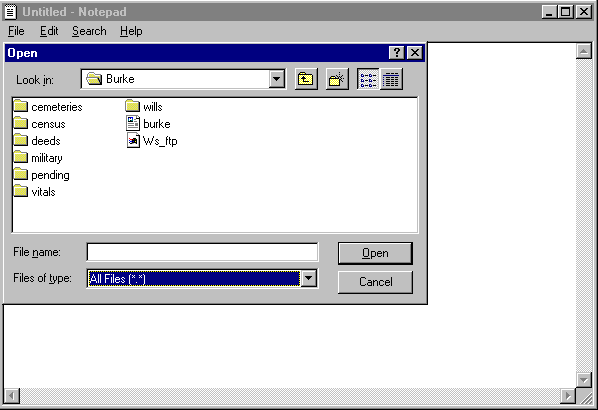
Click on the Cemetery folder, and the cemetery documents will be displayed: (In these example, NoteTab is the default text editor, and so each file is shown with the NoteTab icon).

Click on the Chapman file, and the top of the document is shown. Each document in the Archives must have a header that consists of the documents name, and the county where it is located. This is a key part of the information that is found and displayed by the USGenWeb Search Engine, and must be at the top of the document. Each document must also have the name and e-mail address of the contributor, and the USGenWeb Notice. These may be placed at the top of the document, as shown here, or at the bottom.

Click on File, then Click on Open, and select the Burke County TOC, which is named burke.htm. After the TOC is opened, cursor down to the Cemetery category, and find the Chapman Cemetery. It will look like this:
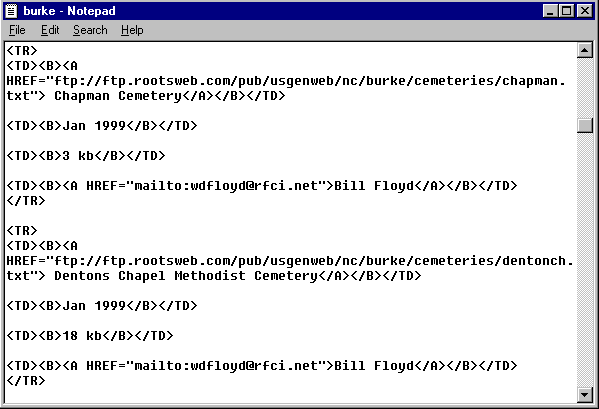
Making a new TOC entry is a matter of copying and pasting an existing entry, and making changes to it. For example, let's assume that Bill Floyd has contributed a new cemetery listing for the City Cemetery, a large 97K file. Use the mouse to select the entire entry for the Chapman Cemetery, then Click on Edit, and then Copy. This copies the entry to the Windows Clipboard.

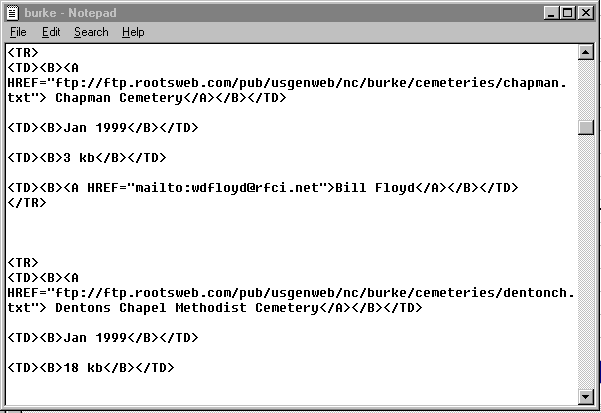
Move the cursor to a position where the new file will be in alphabetical order, in this case, right below the Chapman Cemetery. Hit the Enter key twice to make room for the new TOC entry:
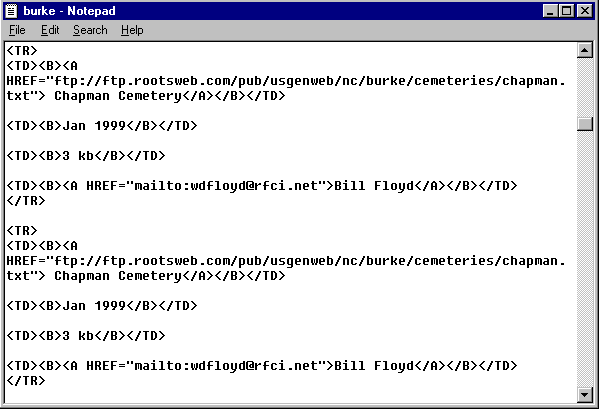
Place the cursor in the center of the space, Click on Edit, then Paste, and the Chapman Cemetery entry will be pasted from the Clipboard to the open space:
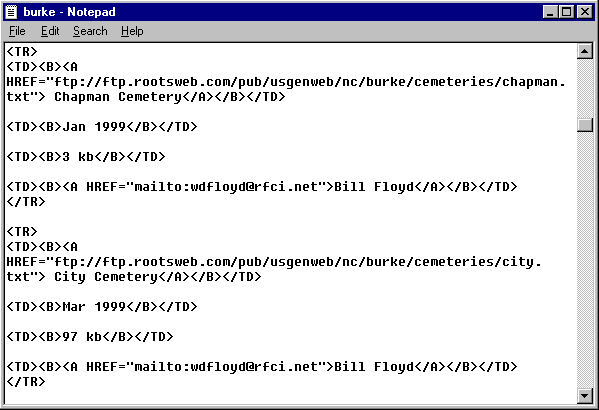
Using this copy of the TOC entry, enter the data for the City Cemetery, file name city.txt, into the appropriate spaces to make a new entry:
Click on File, then Click on Save. The TOC is now ready to be uploaded to the RootsWeb server.
Uploading New Documents
When a newly contributed file has been processed, and a TOC entry for the file made, it is ready to be uploaded to the RootsWeb server. Start WS_FTP, and choose NC Archives. Click on OK to go online and connect to RootsWeb.

When the connection is made, you will see the following screen:
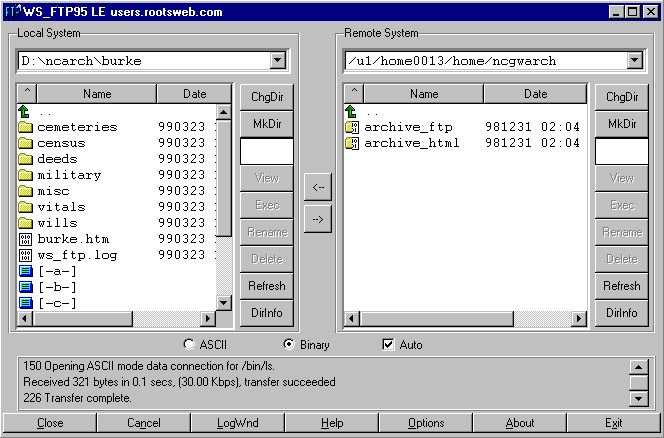
Double Click on the archives_ftp folder icon. This will open the folder that contains all of the county documents. Cursor down to the Burke County folder and click on it:
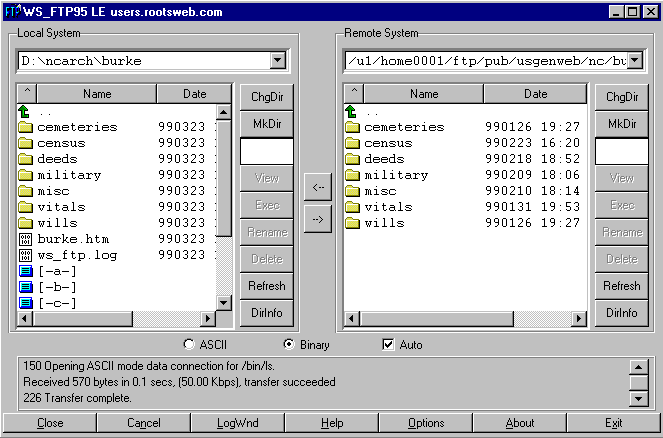
Double Click on the Cemeteries Folder in both the Local and Remote Systems:
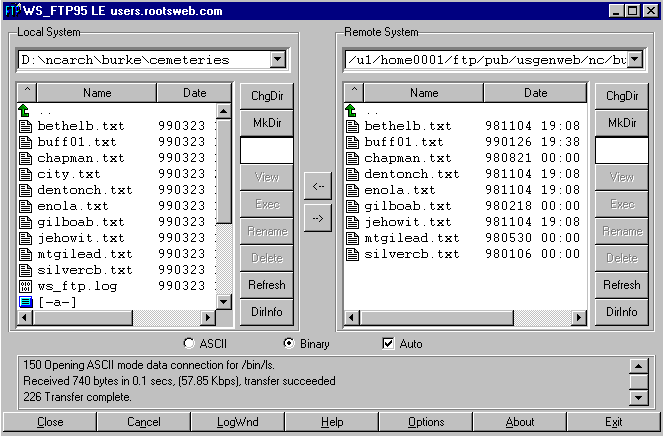
Double Click on city.txt in the Local System to upload it to the RootsWeb server:
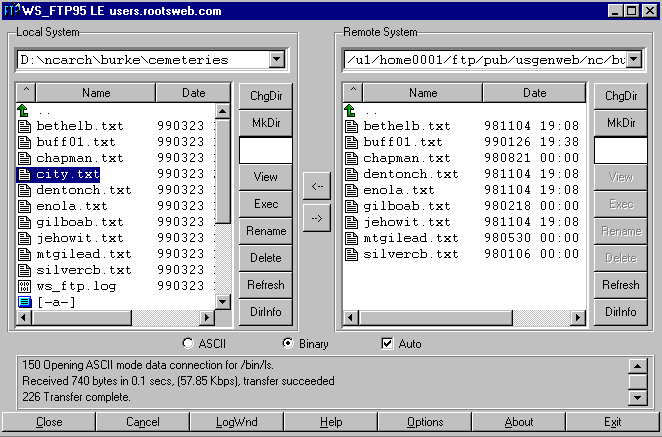
After the City Cemetery file has been placed in the Archives, the revised TOC needs to be uploaded. Go to the archives_html folder by opening the Remote System directory window, and Clicking on /u1/home0013/home/ncgwarch:

Double Click on archive_html to go to that directory:
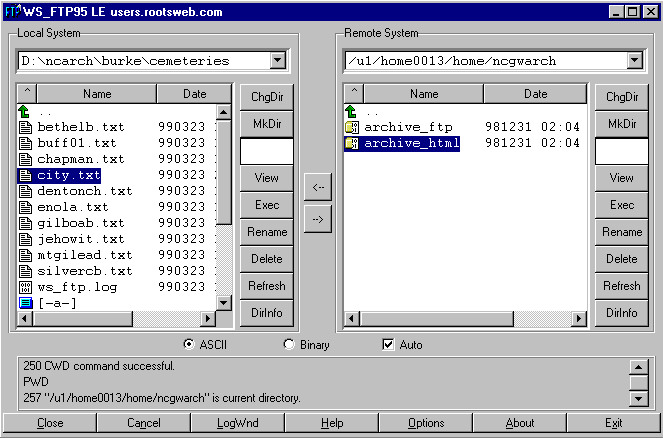
In the Local System, click on the Green Higher Directory Arrow.
 This will take you to the Burke County folder. There, double click on burke.htm to upload it to the RootsWeb server.
